Professional Development Project 2 | "Beloved Flower
 Micke Kring
·
Micke Kring
·

After my first professional development project “Upptaget - Vänta - Stigin” reached 1.0 status and is up and running, it’s time to kick off a new project. The continuing theme of my professional development is Python, maker-DIY and having fun. Combine that with my love of plants and the next project is obvious. It’s going to be a self-watering system.
The project is finished and yes, it turned out pretty well, but no, I didn’t manage to document the whole process. First up is a short video that goes through what the pot does. After that come scattered parts of the project.
Part 1 - Components start arriving - 29 Nov 2017

Now it’s time for me (and also Jacob Möllstam over on his end) to start a new professional development project. My previous project with the Upptaget-Vänta-Stigin box lives on and will be shared soon, as I’ll put everything on GitHub and the blog. But… what is this project then? Well, it will involve some kind of single-board computer, a water pump, a camera, a moisture sensor and a speaker. The idea is a self-watering system. A moisture sensor should detect if the soil starts to get too dry and thereby trigger the pump to water the plant. Of course I’ll be able to see the plant via a camera on the web. Gotta have some IoT elements.
Then I wondered if the system could talk to me. And maybe I to it. You should talk to your plants after all.
Anyway, today the pumps I ordered from Aliexpress in China arrived and I’m in the sketch stage. If you have ideas about what would be fun to include in a project like this, please leave a comment.
Part 2 - Sketching a prototype of the pot - 30 Nov 2017
 I’ve started quickly sketching the pot, i.e. the mother-modem, the very heart of the hard disk. I’m thinking of a modular system, where the plant lives in the middle, with a module for the speaker, one for the pump and assorted LEDs and one for the computer. I do need to think a bit more. And as you can see in the text above, yesterday’s tip from you came along. Something tells me this project will also get a Star Wars theme.
Part 3 - Test print and size check - 1 Dec 2017
 Today I got a quick sketch printed of one of the modules, i.e. the actual flower pot, to get a feel for the size. I’m a bit limited by size since we have small Ultimaker 2 Go printers and hence the choice of modules. Last night I sketched further on a mounting system for the pot and some harder angles. As you can see this needs a little sci-fi twist too. Not everything is just function. It should be fun as well. The video shows the latest sketch. I also tested printing a smaller part to see if the model might be waterproof. I’d rather avoid having to line the pot with plastic.
Part 4 - Sound - 4 Dec 2017
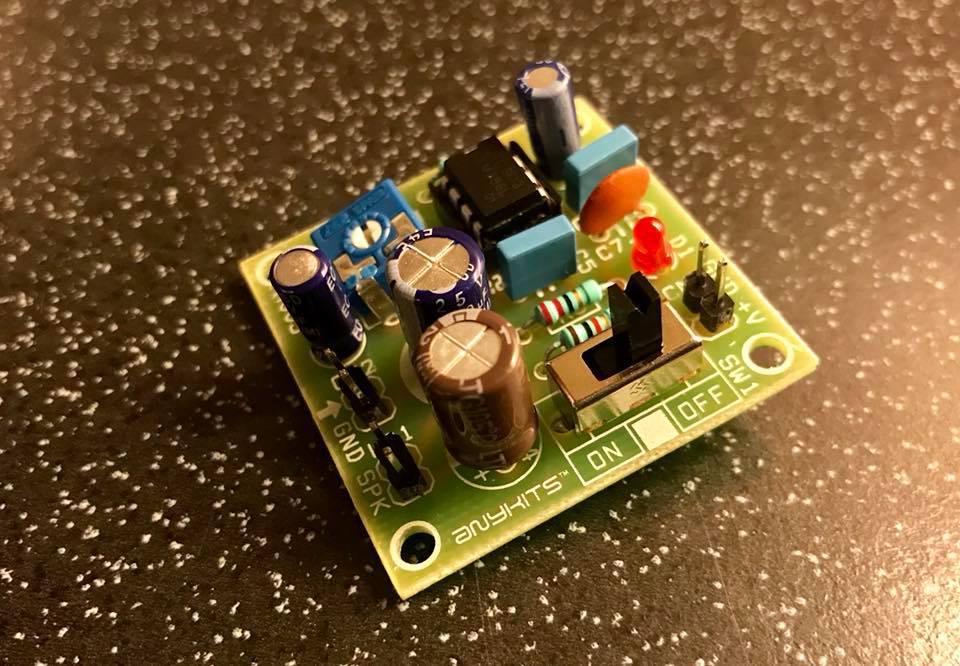
While I’m waiting for components from China, like moisture sensors and tubing for the pump, let’s jump quickly to sound. We agreed the pot should talk. And maybe play music. So… okay. I had ordered a small amplifier and speakers that I was going to build into one of the speaker modules. To be honest, I hadn’t really expected it to come in parts. So now it’s time to do a Pippi and try to put this together. I’ll report back on whether it ended up in the trash or not. First I have to figure out which component is which.  After a lot of soldering I think the components are maybe where they should be. I had to identify and calculate which resistor was which using the color codes and then use process of elimination on half of them. Unfortunately we don’t know if the damn thing works today because I have nothing to power it with. I’d guess the odds of it working are somewhere around 10-15%.
Part 5 - The speaker module - 5 Dec 2017
No, the amplifier didn’t work. I can see there’s current through some parts, so I’ll take that to mean I’ve made some pretty bad solder joints or similar. I now need to get a multimeter, desolder braid and a few more tools. A wire stripper. Teeth are not a good idea. Anyhow, tonight I started sketching a prototype for the speaker module that will be printed tomorrow. I’m doing it without a top and back because I need to measure the electronics and see how the cabling and such should be routed. Here’s 45 minutes of sketching sped up into 2 minutes. Oh, and the moisture sensors from China arrived today. Only tubing left to get going with the main part of the project.
Part 6 - Sensors, some programming and output - 10 Dec 2017
Now I have all the tech except tubing for the water pump, so it’s getting time to put this together and test. In the film you see two tests — one where the moisture sensor is dry and one with water, plus the response of red versus green LED and text-to-speech. A few lessons learned; the moisture sensor shouldn’t be powered all the time. The combination of soil pH + water + electricity kicks off corrosion on the sensor and after a short while you have no sensor left. I’m thinking you might measure maybe once every half hour or so. The second is that the RPi doesn’t have analog inputs (like Arduinos) so right now I’m using digital input from the moisture sensor. I’ll solve that later. Third is that the RPi can’t drive the pump without a relay, so that’s been bought so I can send 5V and enough amps. I’ll probably need a relay for the amplifier part as well. For TTS (text-to-speech) I’m using Google’s API and the Python library gTTS. It leans toward British English as you hear in the film. Finally, it’s insanely fun to learn a bunch of new things.
Part 7 - Speaker module - 12 Dec 2017
 Today the prototype for the speaker module was completed. I installed the small speaker element and measured inside where to place the amplifier and wiring. I also printed a Galactic Empire logo that will be the grill for the speaker. Not entirely sure about the function or placement of the LED, so we’ll see. I’m too tired tonight to assemble and test everything, so that’ll be another day. Yesterday I also started working on the logging part of the Python program. It will send these logs to a web server where they’ll be visualized as graphs on a webpage.
Part 8 - PWM - 15 Dec 2017
Most of this project feels like one step forward, two steps back. Like with the amplifier. Sooooo little power. I was about to throw it away but Googled a bit and found you could add your own resistors and thereby boost the weak output. But now the prototype of the speaker is done. I learned a bit about pulse width modulation and suddenly, of course, the speaker would light up nicely while sound came out of it. I’ll add a third lamp too. A transparent light edge made with a glue gun. You can see the amplifier outside the speaker. Now it’s the weekend! So have a nice one!

About the author
Micke Kring
I'm fascinated by what happens when people and technology meet. After nearly 30 years in education and development, I explore, prototype and teach AI with the same playful curiosity as when I first started out.