How to create and build your own simple app
 Micke Kring
·
Micke Kring
·

These days at Årstaskolan we’ve released two apps for Android and iOS - Tänktanken and Livsviktig Poesi. I built both with the same tools and they work the same way. So now maybe some of you wonder how it’s done? Maybe you’d like a simple app too? That’s what I’ll try to break down here — how I went about it.
First you might want to ask yourself why you should have an app? Especially such simple apps as the ones I released. Couldn’t I just have created a responsive website instead? Well, absolutely. And at the same time it is also a website. But there are two main reasons for the whole “app thing”. One is push notifications. Being able to ping your users when something new is available to that little thing they always carry with them. The other, which is even bigger, is that students experience it as a big deal to be able to search for their own app in the App Store or Google Play. It feels a bit more real. They’ve been working with the web (as in sites) for ages.
Still interested? Then let’s go! And no, I’m not an expert. And yes, there are a thousand other ways to do this and this was one way that solved what I needed. :)
NOTE that this is not a follow-from-one-to-ten step-by-step manual, but a guide and explanation of the parts that are needed.
Prerequisites and cost
- A self-hosted (self-installed) WordPress site. This is where all content is created. NOTE that this does not work with wordpress.com, moobis.se or similar. PRICE: 0-? SEK
- An Apple Developer account (to publish on the App Store). PRICE: $99 / year
- A Google Developer account (to be able to publish on Google Play). PRICE: $25 one-time fee
- A Reactor account at Apppresser (where you build the app itself). PRICE: $49 / month
- A PhoneGap account (where you create your app build for publishing). PRICE: 0 SEK
- A Mac (to be able to create certificates if you publish yourself) PRICE: Too much ;)
A hot tip to reduce costs (if you don’t already have developer accounts with Apple and Google) is to talk to your IT department. We collaborated with our awesome colleagues at SLK-IT who handled the publication of Livsviktig Poesi. If you do the same, your great IT department might be able to take care of everything except the Apppresser account. That changes the price picture a bit. But in this walkthrough I’ll go through the whole process, like with the Tänktanken app which I published myself, so you’ll see the full flow. I should warn you now that I can’t describe things down to the smallest detail, and will refer to the various support pages. This is more of an overview.
1. What kind of app is Tänktanken?
First of all I should describe what this app is and does. Tänktanken is basically a podcast that sometimes becomes a talk show. Ahead of SETT2015 — where we ran live and livestreamed — I thought it would be nice to launch an app in connection with that where we also streamed the live shows with a program for each day. In the app you can check out and listen to all previous episodes and share them. There’s a small photo gallery, an about page and search. And of course the ability to send push notifications.
2. Self-hosted (self-installed) WordPress site
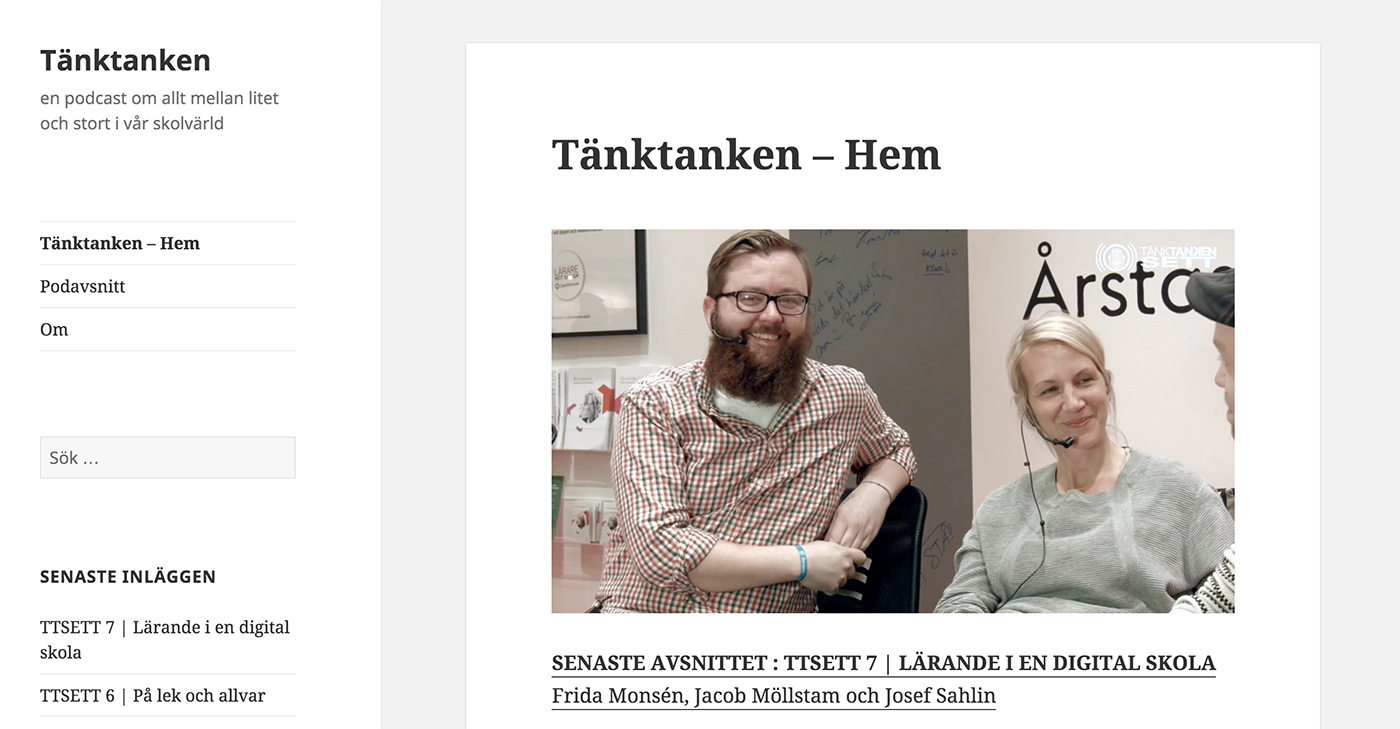 I set up a domain (actually a subdomain) and installed WordPress at http://app.tanktanken.se It works like a normal site and this is where all content is fetched from. Podcast episodes are added as posts and pages are created for e.g. the homepage and about page. Once everything else is set up and the app is running this is where you’ll be working. When someone shares a “post” in the app it links to this website.
3. Reactor - Apppresser - your app builder
On https://apppresser.com/ I created an account (the first month is free, so if you just want to try it you know). In their standard plan ($49 / month) you can create 2 apps. 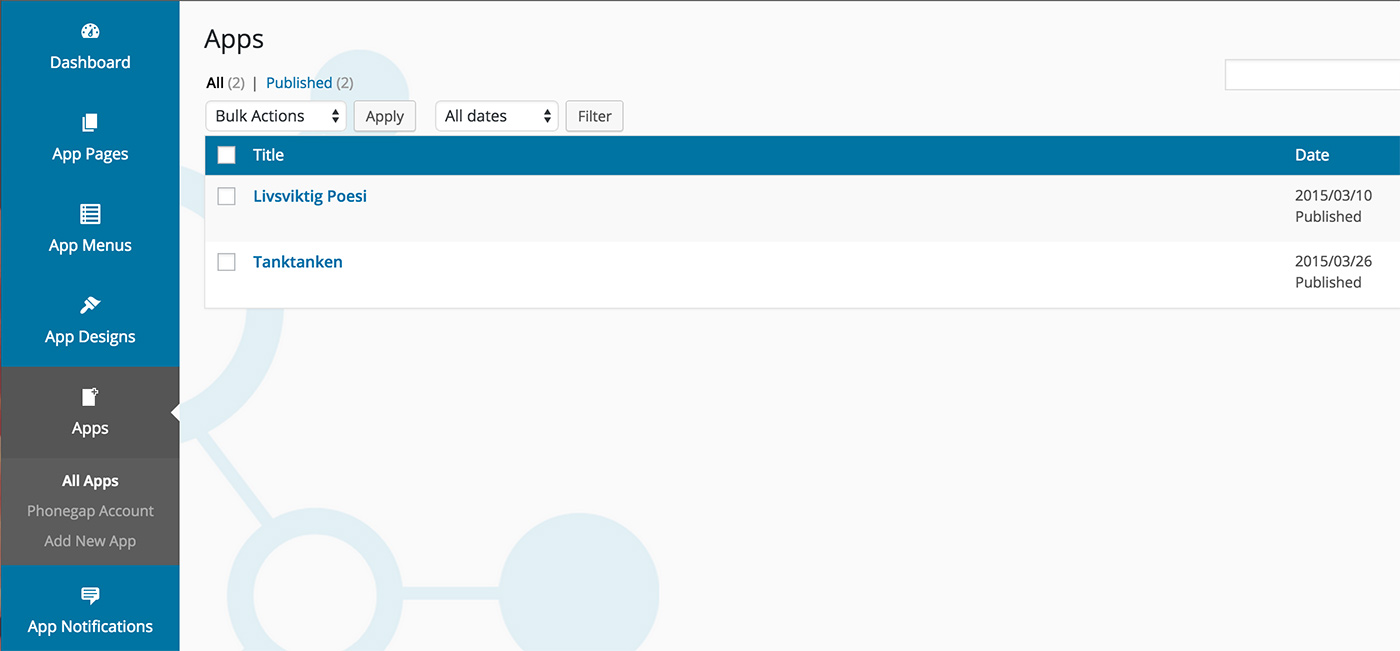 This is where we’ll build the shell of the app — set the appearance, menus, push and more. Content is handled, as I said, in our WordPress site. In that (our WordPress site) we also install a plugin from Apppresser that handles communication between our WordPress site and Reactor. If you’ve worked a lot with WordPress you’ll probably recognize Reactor here too, as it’s also built on WordPress. When you create your app in Reactor and open it you’ll be greeted by an overview and a preview of your app.
 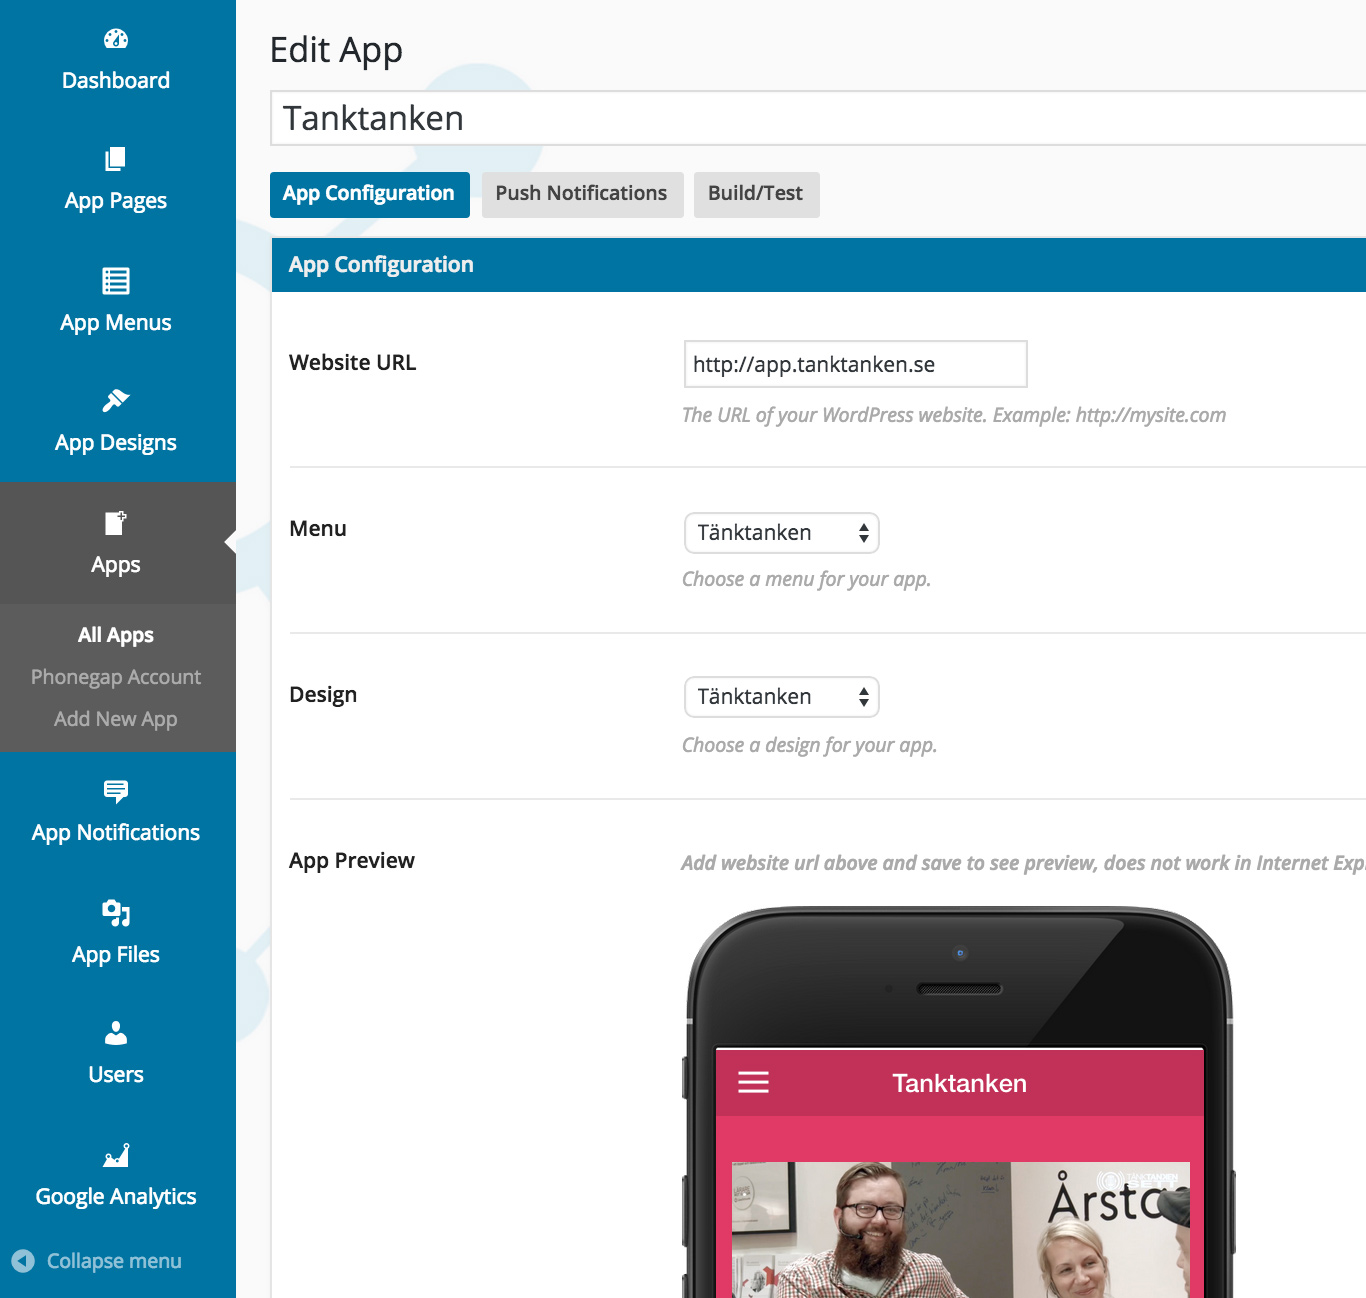 Exactly how you build your app in Reactor is in the documentation, but briefly it’s about creating pages, menus and design.
Pages
To continue my Tänktanken example I created a page in Reactor for the app’s homepage. In the image below you can see the options. Because I want the app to fetch as much as possible from my WordPress site I choose the “Page from Site” option. Then it fetches all information from a page I created in my self-hosted WordPress installation. For listing the podcast episodes (which are posts on the WordPress site) I choose “Media List”. As you can see there are options to create a photo gallery, integrate with Gravity Form (so you can e.g. upload images from your phone into the app), or custom text/html. The reason I want as much as possible pulled from my WordPress site is that if it ended up locally in the app we’d need to push updates whenever something changes. And we don’t want that. An update to the App Store takes about 7-10 days to get approved. 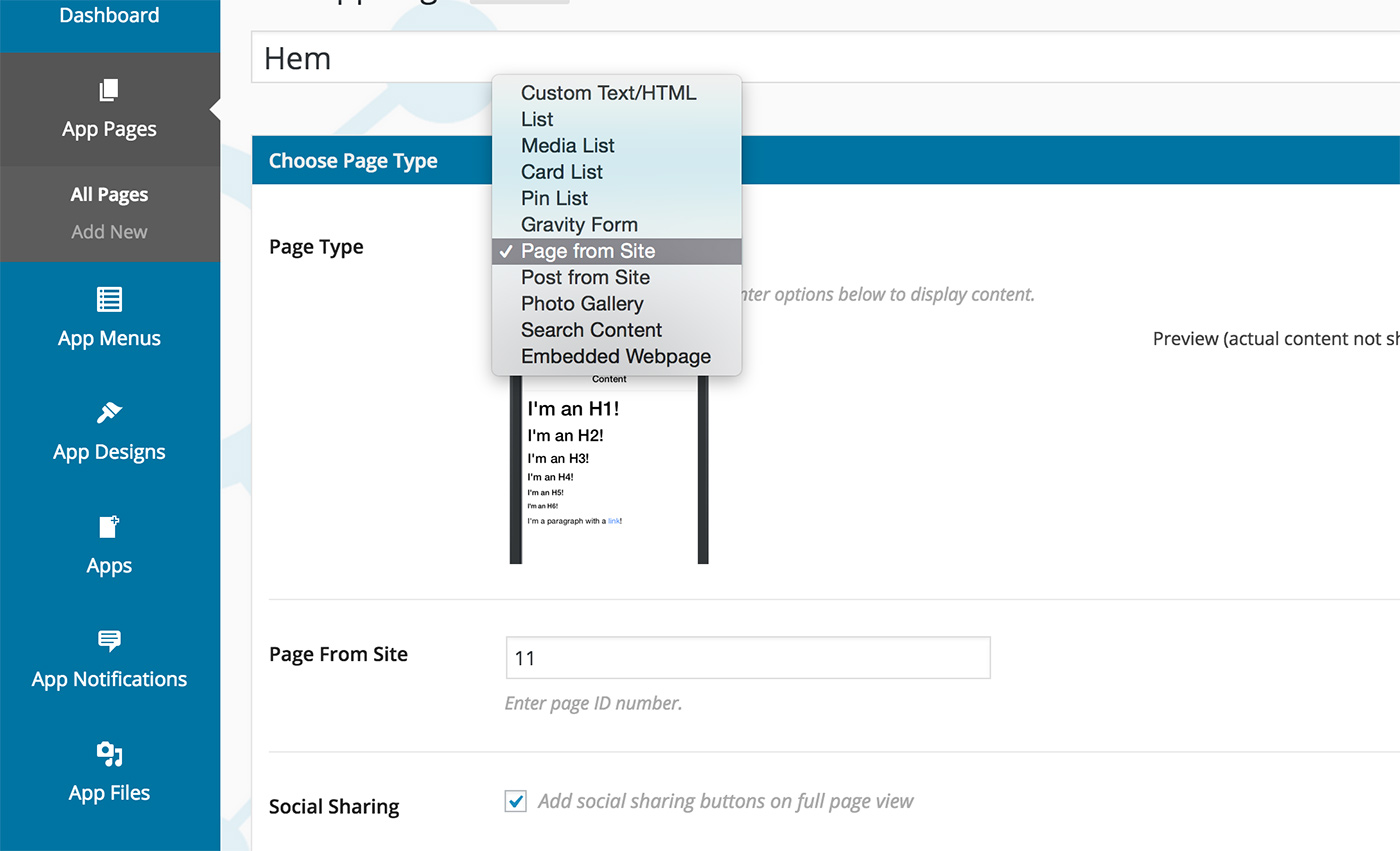
Menus
Again, if you’re used to working in WordPress this is nothing strange. You also get the option to choose icons for each menu item. Since you can create password login for your app you can also choose to show menu items based on whether the user is logged in or not. 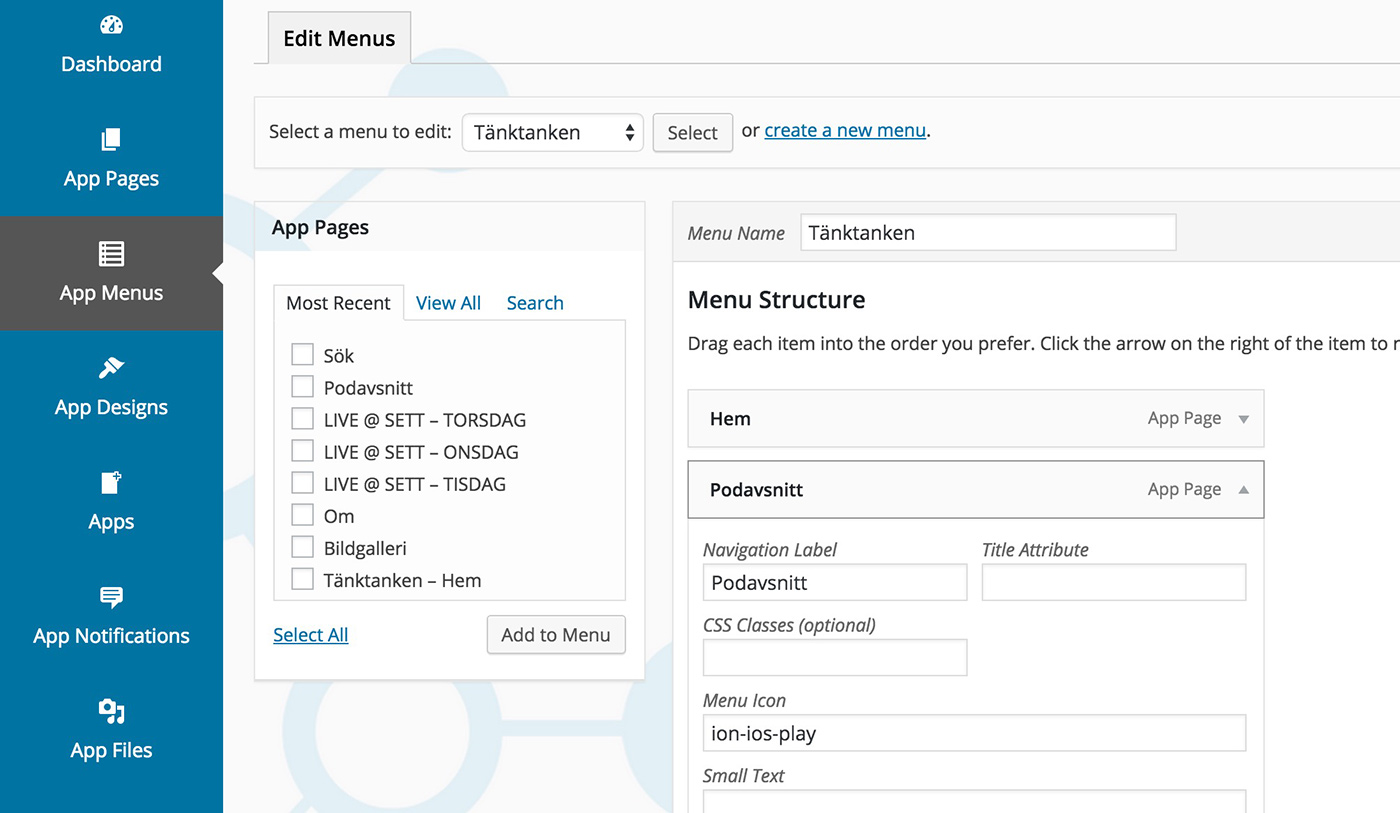
Design
Now we come to the fun part. Putting your own little design on the app. There isn’t yet (Reactor is constantly being developed and is a fairly new product) a huge amount you can change, but… Of course you can inject your own CSS which means with a bit of HTML and CSS you can still achieve quite a lot. 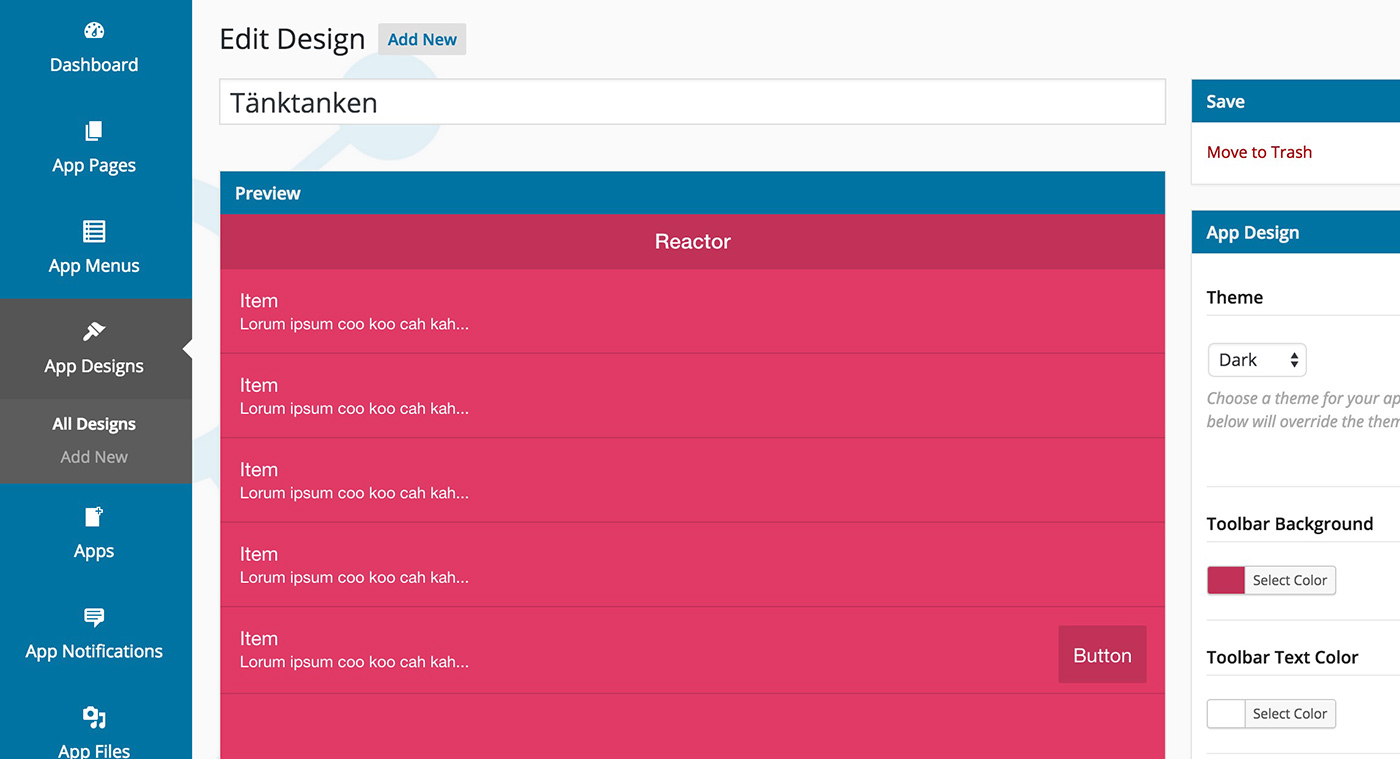 When you feel satisfied just jump back to the “app view” and see how it looks.
Certificates for signing and push
This is probably the trickiest part of the whole thing. Of course it’s trickiest to get right for iOS. Here you and your Mac need to sit undisturbed, have the documentation (there are video instructions) and follow them slavishly to the letter. Even if after a while you feel like you need to drink something strong to calm your nerves I advise you not to. 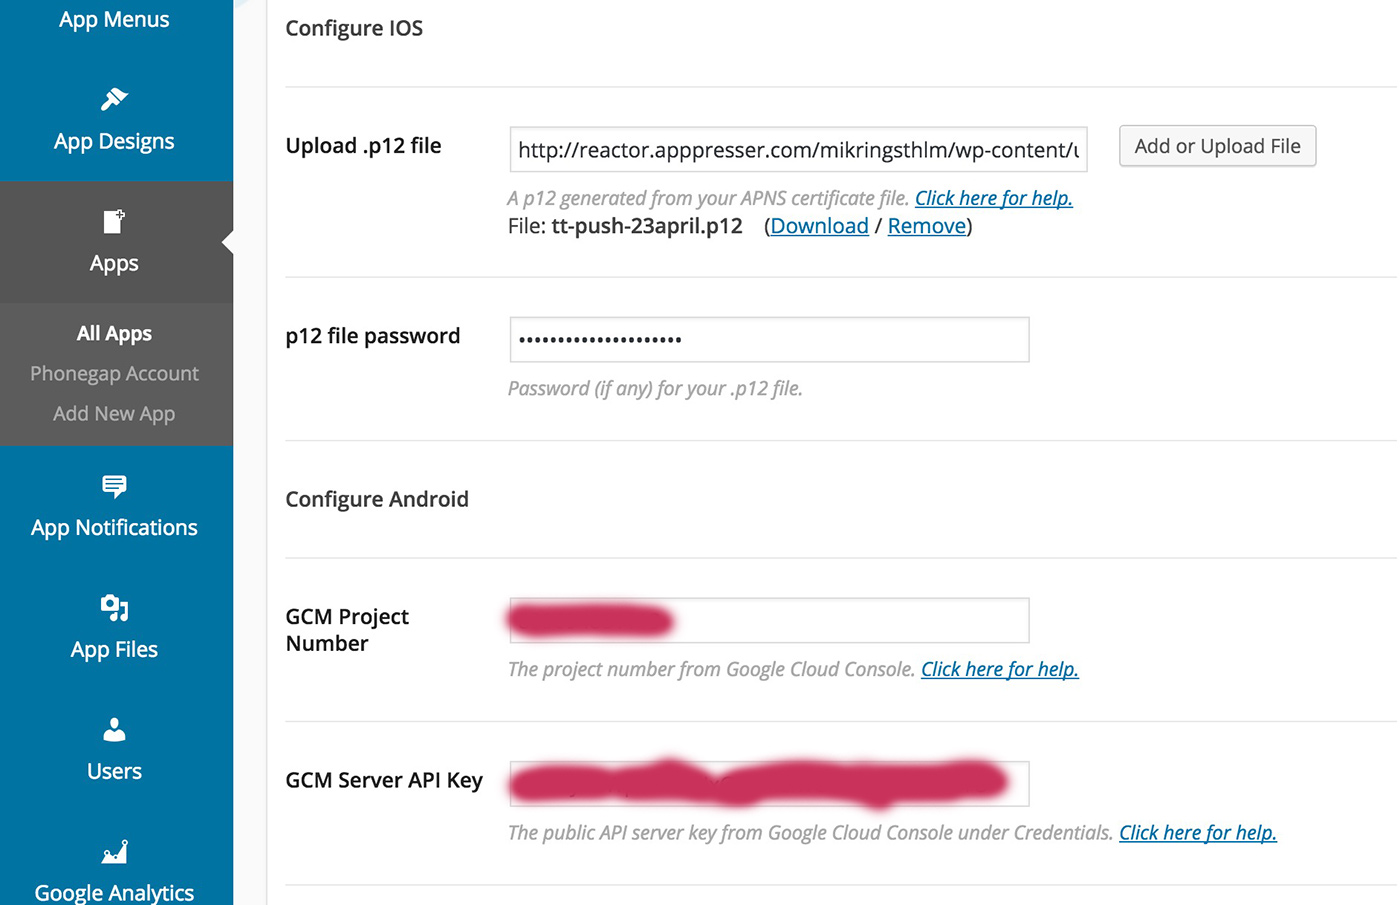 You need certificates for push and also certificates for signing the app so that you can publish it on the App Store. The same procedure for Google Play takes 5 minutes. But 95% of our downloads are on iOS so you just have to grit your teeth.
 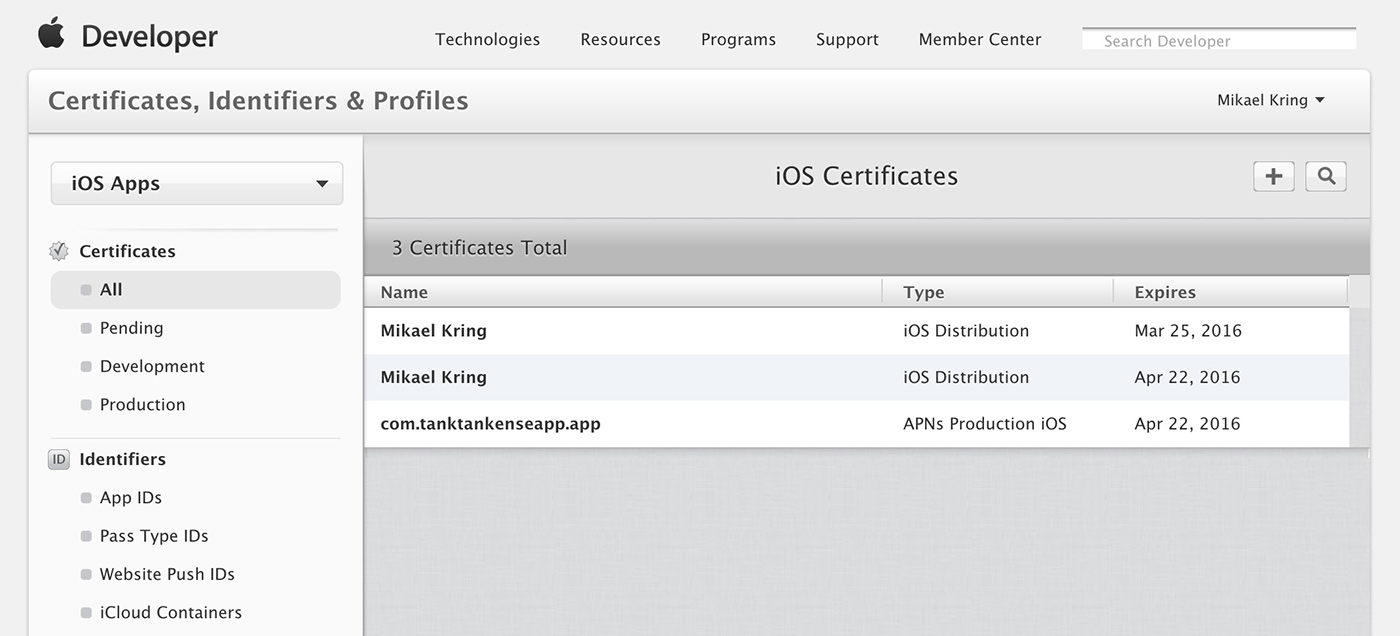 I managed to create push certificates and get push working when I tested the app for iOS, but when I tried to create new ones for the release, it didn’t work (read: I failed). So now I’m waiting for the Tänktanken update to go through to see if I succeeded this time. As I said. Stay calm and follow the instructions.
4. Graphics
![]() What doesn’t come ready-made is of course the graphic bits. You must create a splash screen (the intro image when the app starts) and a logo (the app icon). These have specific dimensions, but all of that is of course also in the documentation.
What doesn’t come ready-made is of course the graphic bits. You must create a splash screen (the intro image when the app starts) and a logo (the app icon). These have specific dimensions, but all of that is of course also in the documentation.
5. PhoneGap
Now we start to feel ready with our app and it’s time to send everything to PhoneGap which is a service from Adobe that packages all your files and certificates into an .ipa (iOS) and .apk (Android) file that you can upload to the App Store and Google Play respectively. 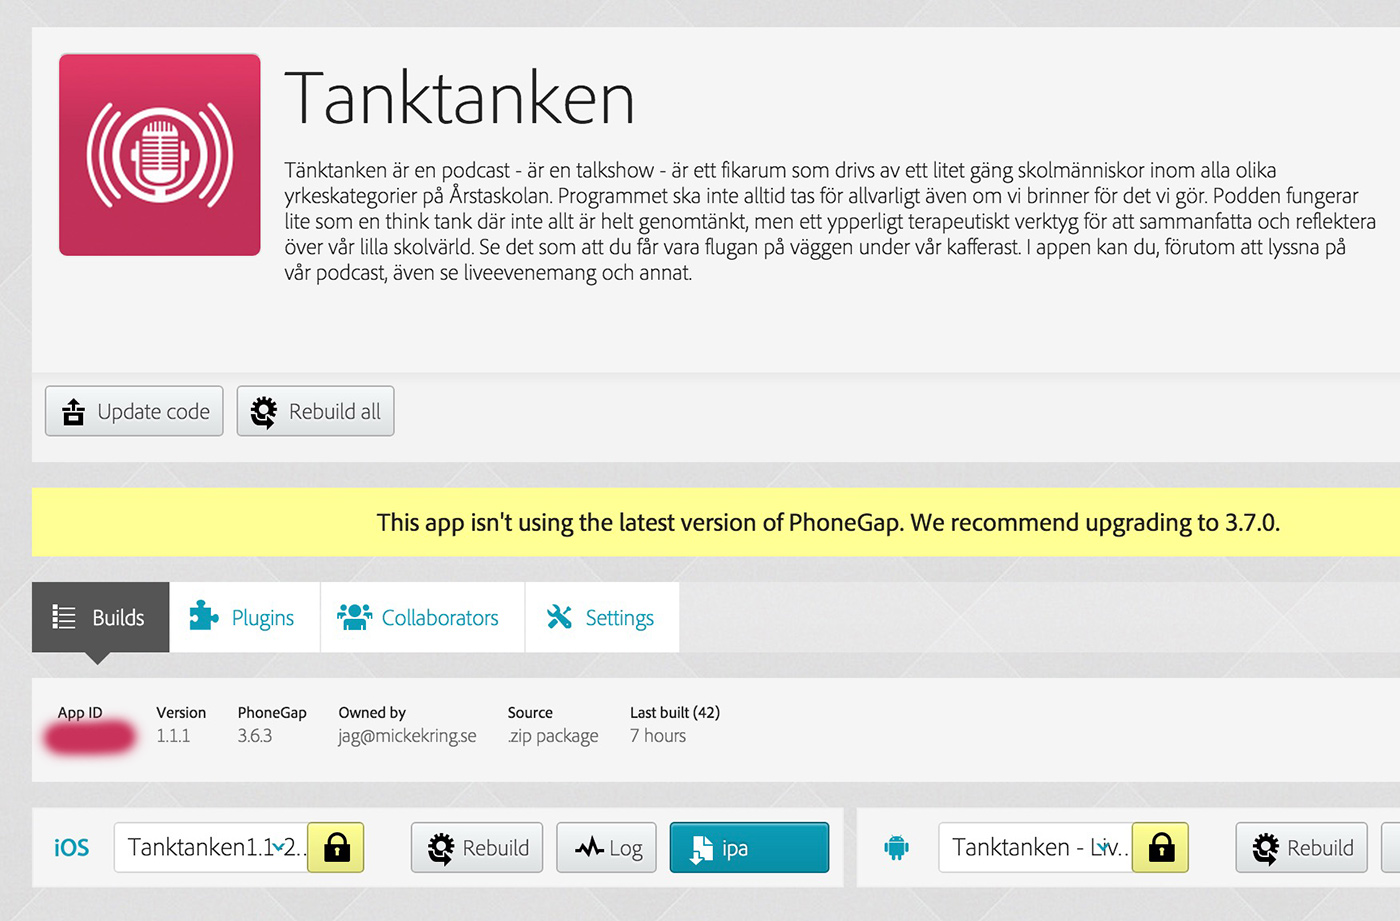 The first thing you do is create a new app in PhoneGap and add your certificates that you created earlier. When that’s done you enter your PhoneGap auth token in Reactor. That ties Reactor to PhoneGap and you can send everything from Reactor so the app is built in PhoneGap. When you’re done with this you can download the .ipa and .apk files and get ready for publishing.
6. iTunes connect - publishing
Now it’s time to ship all the work you’ve put into your app. And keep your fingers crossed that Apple approves your app. There’s still some work left. You have to create an icon and screenshots for all resolutions for both iPhone and iPad to upload. You also need to enter information about the app and assign an age rating. 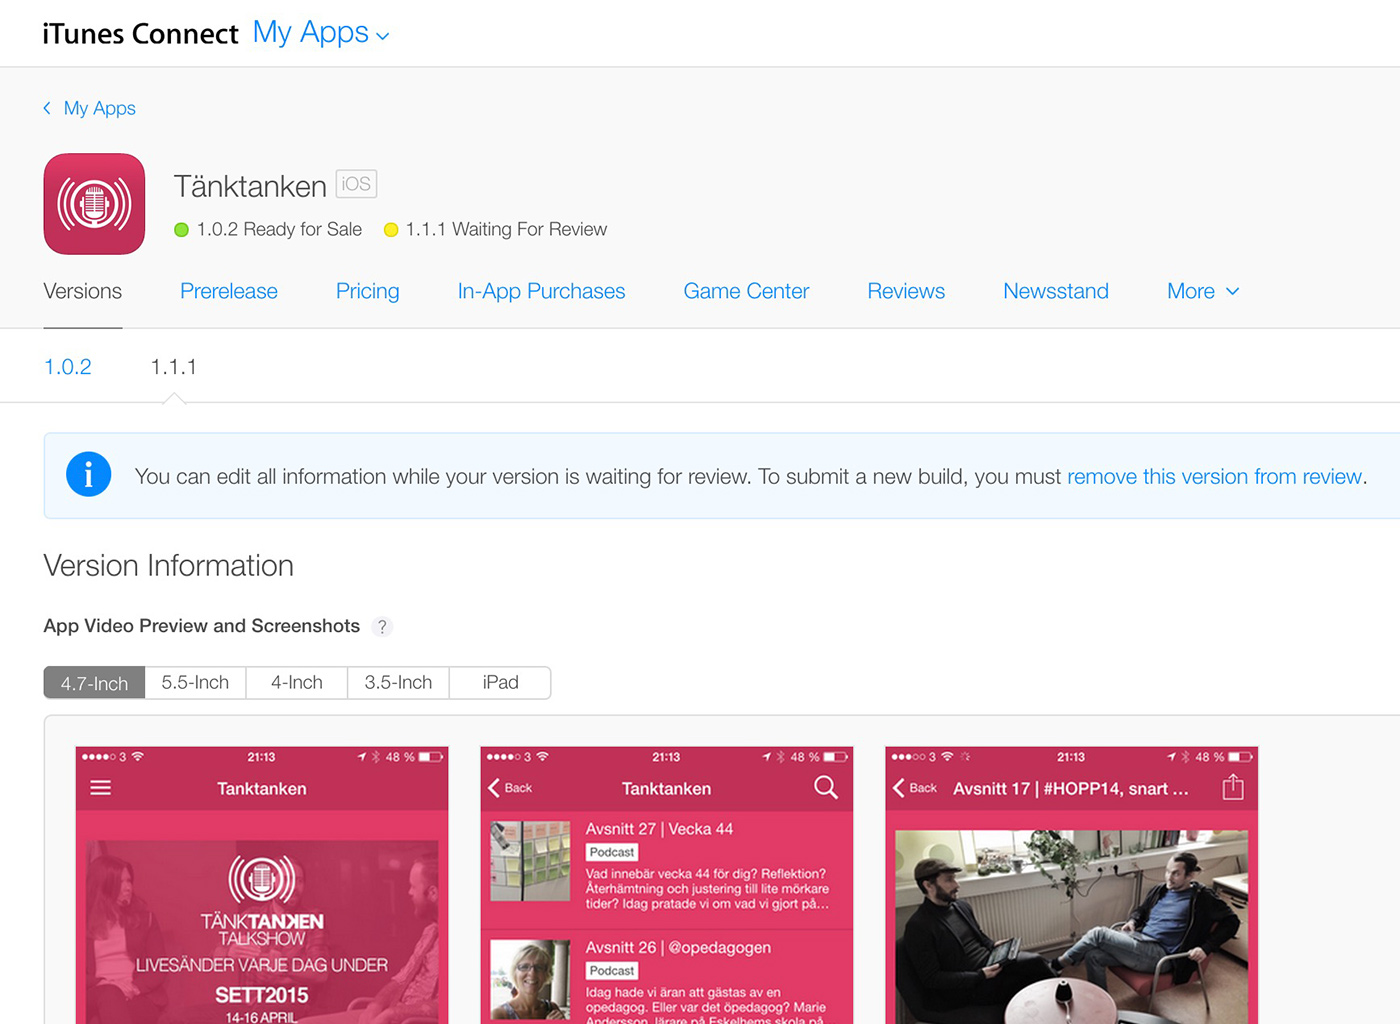 When you’re done you submit it. You’ll get emails with updates on what’s happening, but it takes somewhere between 7-10 days to be reviewed. If you get rejected you’ll also get an explanation why and how you can fix it. Tänktanken was approved immediately and it took 6 days.
7. Google Play - publishing
The procedure on Google Play is largely similar to the App Store, just a bit less picky. 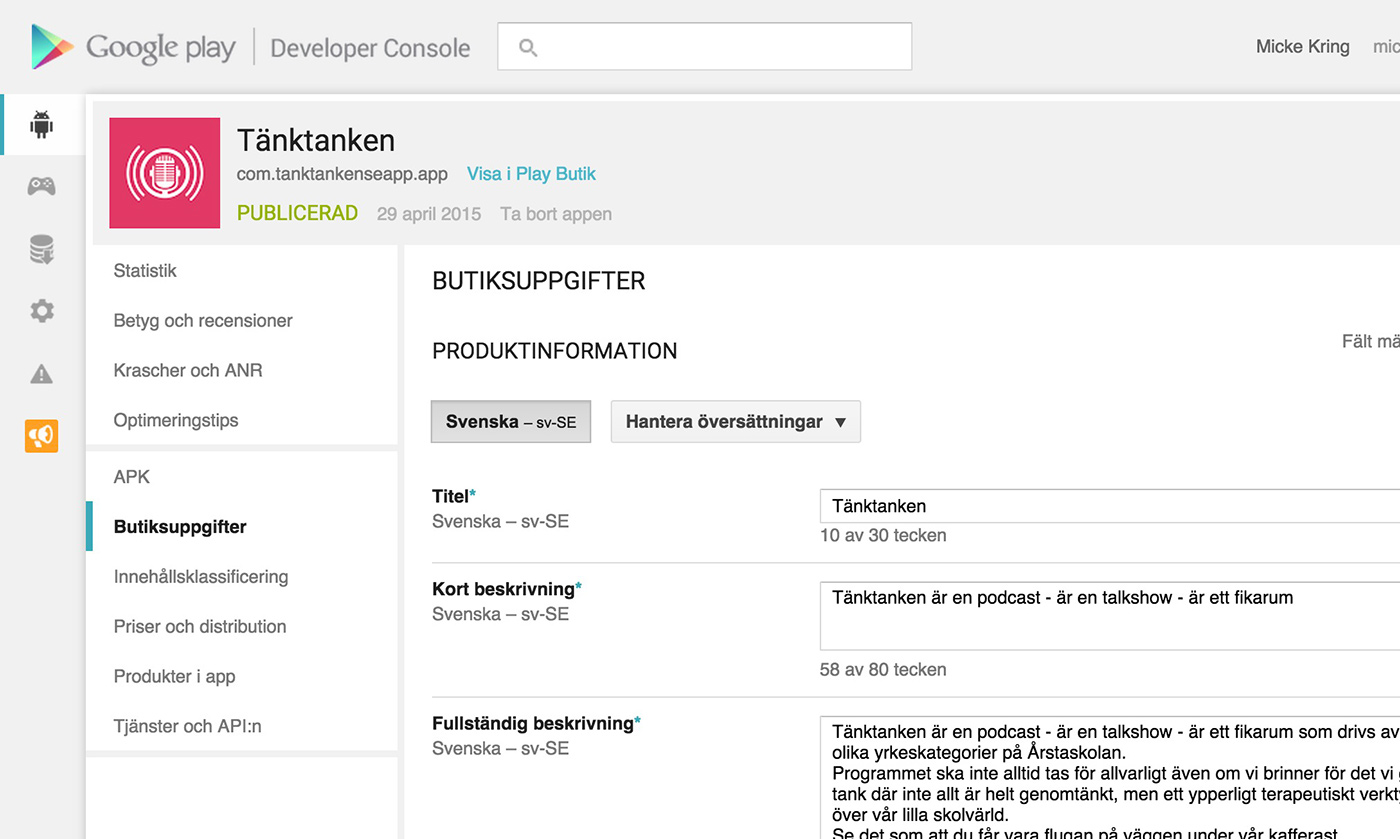 Here too you need to make some screenshots and fill in information about your app. The difference is that the app is live after 1-2 hours. No one needs to approve it.
8. Live on the App Store - Google Play
If everything has gone your way your app has been approved and you can wait for all the millions of people who will install your app. :) So far I have 112 downloads of the Tänktanken app on the App Store and 7 on Google Play. 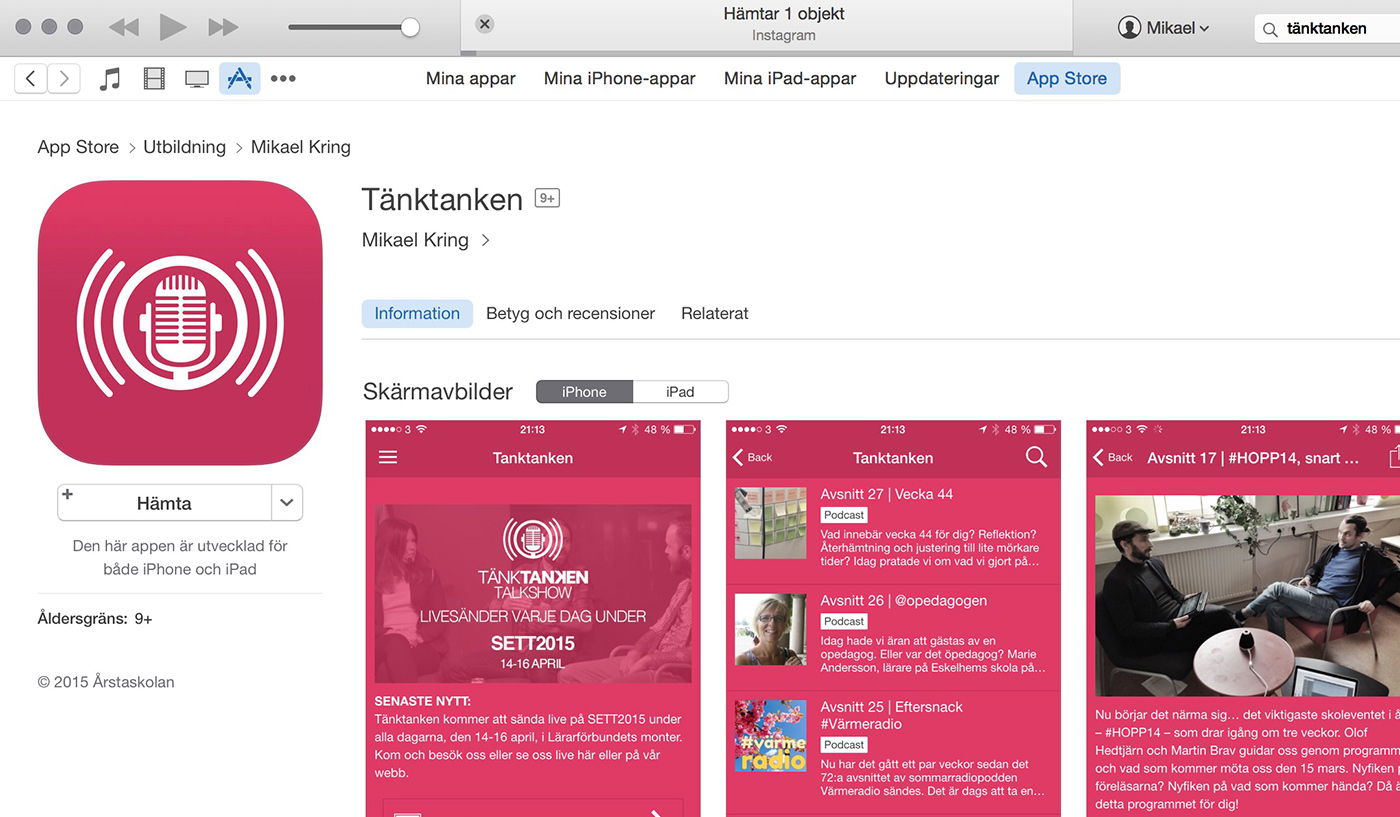 As I said I’m waiting for the Tänktanken update to go through where I fixed background audio. Kind of rough to have a podcast app that stops playing when the screen is turned off. ;)
9. Keep publishing lots of (hopefully) good content
Now that the app is published it’s, as I wrote at the beginning, in your WordPress site where the work is done. Publish posts, set up pages, etc. 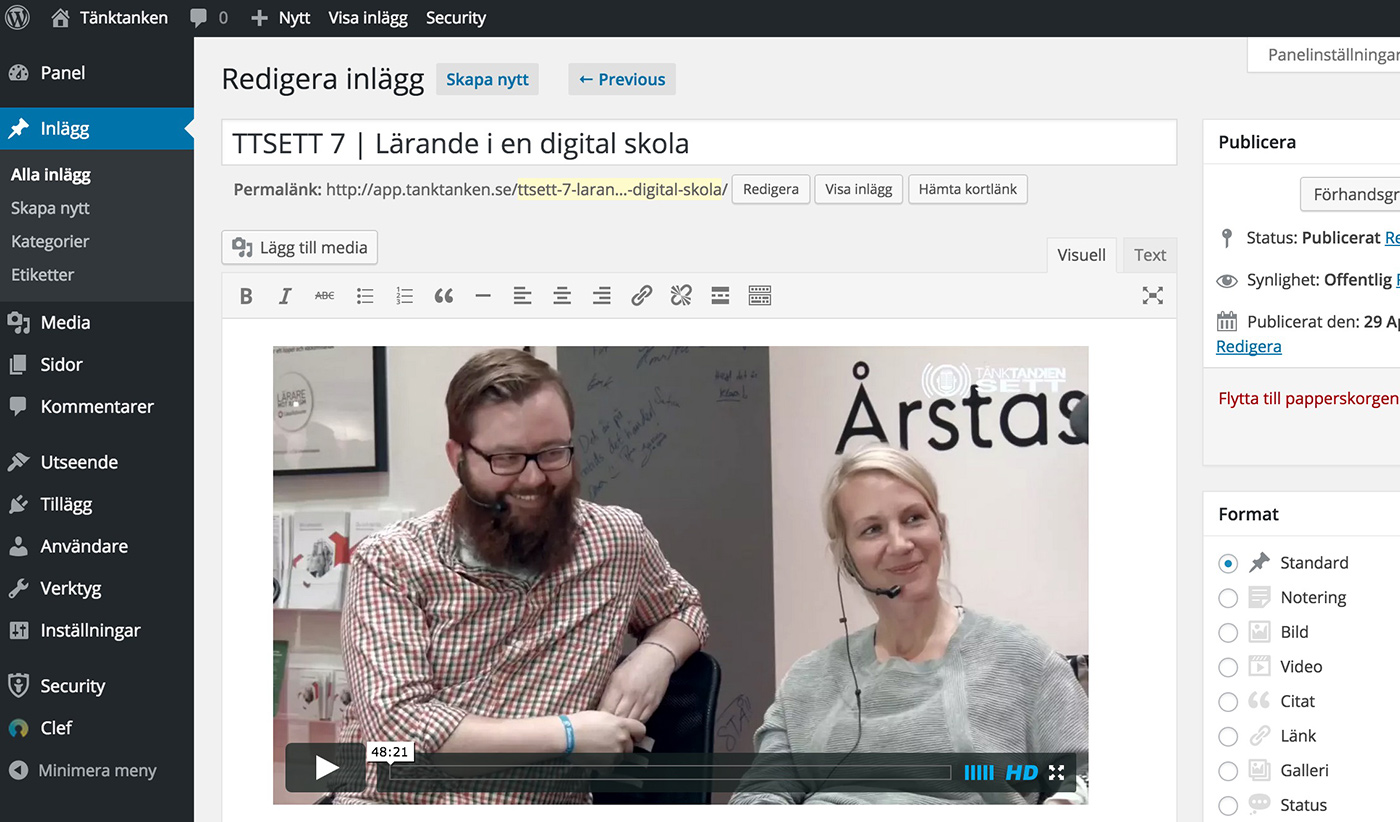 Of course you must tell the world your app exists, but that’s a whole other article. :) And of course you’ll probably want to continue improving and tidying up your app. Maybe some extra graphic elements? New features? A tip is to take everything slowly. Google (or Bing) and read up. There are always a million others who’ve had the same problem as you. And read through Reactor’s documentation. They cover pretty much the whole process.
Good luck and if you have questions, post them as usual in the comments so more people can benefit from the Q&A.
About the author
Micke Kring
I'm fascinated by what happens when people and technology meet. After nearly 30 years in education and development, I explore, prototype and teach AI with the same playful curiosity as when I first started out.